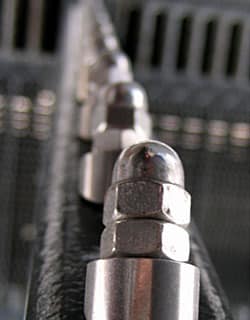
The most common cause of leaky gasket joints is improper installation procedures. That’s why proper flange bolting is so important. In this guide, our experts tackle the steps of the best method to use. Take care at all stages listed below.
Cutting soft gaskets
First cut or punch the bolt holes. Cut the bolt holes slightly larger than the bolts to ensure proper seating, and never cut out a gasket by hammering material against the flange. Use a good cutter to shape the gasket and ensure that the inside diameter of the gasket is not less than the inside diameter of the process line to minimize obstruction of the process line.
Handling gaskets
Carry cut gaskets carefully when working in the field. If you bend the gasket it will be damaged. Always transport large diameter metallic and semi-metallic gaskets to the installation site on the mounting/packing.
Required tools and cleaning
Tools are required to both clean the flange and tension the fasteners.
- Clean fasteners with a brass wire brush to remove dirt from the threads. After removing old gasket, clean the flange surface of all debris using a wire brush (use stainless steel bristles on alloy components) or a brass scraper (a scraper can be made from a sheet of brass, ~5mm thick x 50 mm wide, which is filed and shaped to a 45 degree chisel across the width). Using a hammer, lightly tap the scraper into the flange grooves to remove debris.
- Flange spreaders may be used to make gap between flanges for cleaning them. Two spreaders are required for a joint. Use mechanical / hydraulic type spreader based on force required to open flanges.
- The tensioners will require regular calibration and may include torque wrench, hydraulic or other tensioners. Instruments to measure tension may include a micrometer or Ultrasonic equipment.
Visual inspection
Inspect Fasteners, nuts, washers:
- After cleaning examine them to assure freedom from defects such as burrs or cracks.
Flange assembly:
- Inspect the flange surfaces for defects, such as radial scores and warping. Ensure that the flange surfaces are sufficiently flat and parallel.
Gasket:
- Check that the correct gasket is available (suitable for the service, size and thickness). Examine the gasket prior to installation to ensure that it is free from defects.
Lubrication
It is estimated that in the absence of a suitable lubricant, up to 50% of the torque effort may be used to merely overcome friction. Effectively, this would mean that the same torque applied to non-lubricated fasteners on a joint might provide markedly different loads on each one. Lubrication is essential when torque is used as the control for setting tension in the joint. After cleaning, lubricate fastener threads and all bearing surfaces (underside of bolt heads, nuts, washers) with a quality lubricant such as an oil and graphite mixture. Ensure that lubricant does not contaminate either flange or gasket faces.
Gasket Installation
Carefully insert the new gasket between the flanges to prevent damage to the gasket surfaces and center it. Do not use tape to secure the gasket to the flange. If it is necessary to secure the gasket to the flange, use a light dusting of spray adhesive (e.g. 3M type 77). Do not use jointing compounds or release agents on gasket/flange faces.
Bolt tightening pattern
One of the most difficult jobs is to produce the correct assembly pressure on the gasket, low enough to avoid damaging the gasket but high enough to prevent a leak in the seal. It is important to accurately control the amount of force applied to any particular flange arrangement.
Always use a torque wrench or other controlled-tensioning device for tightening. The sequence in which bolts or studs are tightened has a substantial bearing upon the distribution of the assembly pressure on the gasket. Always torque nuts in a cross bolt tightening pattern. Always run the nuts or bolts down by hand.
This gives an indication that the threads are satisfactory (if the nuts will not run down by hand, then there is probably some thread defect – check again and, if necessary, replace defective parts). Now torque the joint using a minimum of 5 torquing passes, using a cross-bolting sequence for each pass, as shown below.
Storage of gaskets
Although many gasket materials can be used safely after storage for many years, ageing will have a distinct effect on the performance of certain gasket materials. This is mostly a concern with materials bonded with elastomers. They should not be used after about 5 years from the date of manufacture.
If required, they should be used only after careful inspection. Materials with elastomeric binders will inevitably deteriorate over time, and even more quickly at higher ambient temperatures. Degradation is also catalyzed by intense sunlight. Since graphite and PTFE materials contain no binders, sheets and gaskets of these materials have a virtually indefinite shelf life. In general:
- During storage gaskets should not be subjected to extreme heat or humidity – store in a cool, dry place, away from direct sunlight, water, oil and chemicals.
- Store sheet materials flat.
- Avoid hanging gaskets – they may distort. Store soft gaskets flat. Large diameter spiral wound gaskets should be retained on their mounting board.
- Gaskets should be kept clean and free from mechanical damage (for maximum protection, store in sealed poly bags).
When in doubt, talk to the experts
At Ultra Torq, we’ve been in the business of torque for more than a decade. Our team of professionals brings more than 130 man years of experience in providing bolting solutions to all types of industries. When in doubt, give us a call and enlist our expertise.
Bolts photo credit to Jeremy Noble under cc 2.0
Wire brush photo credit to johnandalyna under cc 2.0


